Setup and Configure Centurylink email settings on Android
If you use CenturyLink services and are interested in using its email service, then you’ve come to the right place. Today, in this article we are going to guide you about how to set up and configure CenturyLink email settings on Android smartphones. Note that it is the manual setup procedure for those who either can’t succeed with auto-setup or want to do some changes manually such as using the POP account. So, without wasting any time, let’s get started with our step-by-step guide.
Make sure that you have an existing CenturyLink account before you start following the below steps.
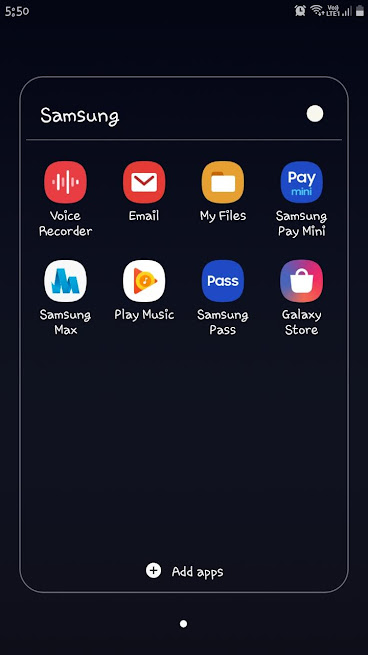
Step 1: Open your Android mobile and select the desired Email app.
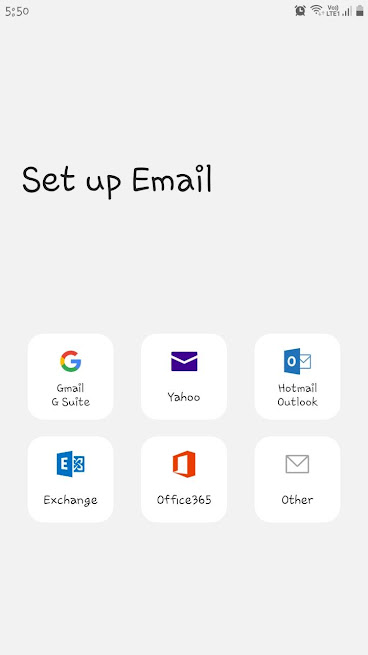
Step 2: Click on Other from the given option on the Setup Email page as shown on the screenshot below.
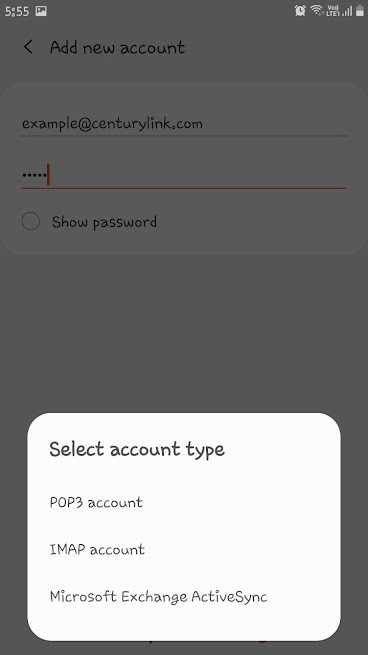
Step 3: Fill in the login details including email address and password and then select Manual setup from below.

Step 4: Choose PPO3 account. If you want to go with IMAP account type, there’s no issue, just make sure you fill-up the IMAP settings only.
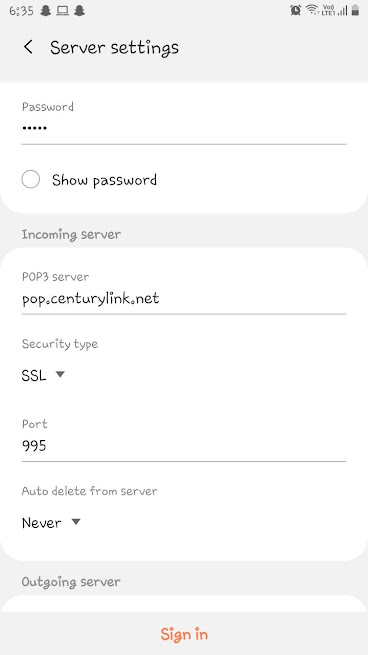
Step 5: Find the Incoming Server option and fill in the details as mentioned below:
POP3 server: pop.centurylink.net
Security type: SSL
Port: 995
After completing the above-mentioned steps hit the Sign-in button and you are good to go. If for some reason, you can’t complete the CenturyLink email settings configuration, don’t hesitate and give us a call right away. You can reach us at CenturyLink Customer Support Number, we have a crew of talented technicians who can resolve your issue in seconds. Moreover, you can also reach us for issues like mail not working, can’t send an email, trouble downloading email attachments etc. your time is precious and we know it, so we won’t take much of your time and try to be as quick as possible.
Make sure that you have an existing CenturyLink account before you start following the below steps.
Setup And Configure CenturyLink Email Settings On Android
Step 1: Open your Android mobile and select the desired Email app.
Step 2: Click on Other from the given option on the Setup Email page as shown on the screenshot below.
Step 3: Fill in the login details including email address and password and then select Manual setup from below.
Step 4: Choose PPO3 account. If you want to go with IMAP account type, there’s no issue, just make sure you fill-up the IMAP settings only.
Step 5: Find the Incoming Server option and fill in the details as mentioned below:
POP3 server: pop.centurylink.net
Security type: SSL
Port: 995
After completing the above-mentioned steps hit the Sign-in button and you are good to go. If for some reason, you can’t complete the CenturyLink email settings configuration, don’t hesitate and give us a call right away. You can reach us at CenturyLink Customer Support Number, we have a crew of talented technicians who can resolve your issue in seconds. Moreover, you can also reach us for issues like mail not working, can’t send an email, trouble downloading email attachments etc. your time is precious and we know it, so we won’t take much of your time and try to be as quick as possible.


Comments
Post a Comment